Introduction
Astronomical objects are fixed in the sky however unique and refreshing images can be made by deviating from standard compositions and exploring new ways of rendering well known objects. In addition many astroimagers today use CCD cameras with separate self guiding tracking chips (SBIG). Although these cameras have revolutionized amateur astroimaging, careful framing of compositions is necessary to ensure that a suitable guidestar falls on the selfguiding chip. Also the selfguiding mechanism has become more sophisticated recently allowing the imager to deviate from framing that is strictly aligned with the declination and RA axes. I present here a new method that allows the imager to visualize and plan novel compositions and also find accurate guidestar combinations for those compositions. The method uses three popular programs commonly owned and used by astroimagers for other purposes.
Outline of Method
The imager will make a screen grab of the field of interest from "The Sky". A widefield image of the object can easily be obtained from the web (with permission of course) or from the imagers own inventory and will be registered and aligned to the screen grab using registar. Using Photoshop's unique layering capability, the imager will make a photoshop document having several layers including the screen grab from "The Sky", a widefield image of the object, and the imagers FOV template which we will construct in Photoshop. Using Photoshop's ability to rotate layers the imager can easily plan compositions and find guidestars by rotating the FOV template over the other layers.
Method
Once the imager decides on an imaging project all that is needed are the three programs listed above and a widefield image of the object.
1) Find the object using "The Sky". Make sure to zoom out an appropriate amount to allow for later layering of a widefield image.
2) Make sure that the FOV indicators are enabled in "The Sky" so your particular telescope/camera FOV (Field of View) template is on the screen. You may also want to leave the "rotate tool" (right click on screen, select rotate tool) for later orientation as to direction (N,S,E,W). At this point you can make a second screen grab with the FOV indicators "off" (clear screen, just stars) or later you can remove the FOV template from a duplicate image in Photoshop (see #1 under NGC1999 example below to learn how to do this).
3) Make a screen grab of the field of interest from "The Sky" by pressing "alt" and "print screen" on the keyboard. Then go to photoshop, select "file", then select "new". A blank canvas will appear with the same resolution as the screen grab. Select "edit" then "paste" which will paste the screen grab onto the canvas. Flatten the image by selecting "layer" then select "flatten". Crop the image so that only the field is visible. You can save this to a predetermined directory as a high quality jpeg, but do "not" change the image size.
4) Bring both the screen grab and the widefield image of the object into "registar" and register the widefield image to the screen grab. After registering the two images select "crop/pad image" then choose "union with" and save the image as a high quality jpeg. It isn't necessary to save any of these images as tiff files. Jpegs will suffice and will save on disk space.
5) Bring up the second screen grab made without the FOV indicators (just the stars) into Photoshop. Bring up the widefield image you previously registered in "Registar" and cut and paste this onto the screen grab. (Most likely you will not need to align it as it should fit perfectly over the screen grab if you followed step #4). Select "lighten mode" as the blending mode and adjust the opacity so the image is transaprent to the starfield of screen grab.
6) You will now make your FOV template layer. Bring the Screen grab with the FOV template into Photoshop. Magnify the image to 500%. Using the color range tool select the orange FOV template. Once the thin orange FOV template (which includes the Guidestar template) is selected go to "select" then choose "inverse select" and apply a gaussian blur to the remainder of the screen grab which will eliminate the stars and make the screen grab black except for the orange FOV template. Select the entire image ("select" then "all"), and "cut and paste" this image the photoshop document made in #5. Select "lighten" from the blending mode menu. Now you should have three layers; the starfield from "The Sky", the widefield image, and your FOV template. Using lighten mode for each layer should allow simultaneous visibility of each layer. You may need to adjust layer opacities accordingly. To make it easier to later rotate the FOV template layer you may want to delete most of this layer except for the orange FOV template. This is done quickly by selecting large portions of the image with the rectangular marquee tool and pressing delete. Alternatively you can select the black background of this layer with the color range tool and hit "delete".
7) You should now have a photoshop document with three simultaneously visible layers; the starfield, the widefield image, and your FOV template. Now you can easily rotate the FOV template over the starfield and widefield image using the right mouse menu of the layer tool. Select the FOV template layer from the photoshop layer menu, rightclick on the image, select "free transform", then right click again and select "rotate". By grabbing this layer at the edge and rotating you are ready to plan the best camera orientation to not only create the desired framing but also find a suitable guidestar. After finding the desired composition and a suitable guidestar you can then easily calculate the amount of camera rotation from the photoshop image. You may need to consult "The Sky" if you need to know the magnitude of the guidestar. Make sure to save the photoshop document with all the active layers.
Example: NGC 1999
1) Make two screen grabs of the desired field, one with the FOV template, one without. * Alternatively a field without the FOV template can be created from a duplicate of the image with the template. Just "select" the template using the color range tool and blur it out with a strong gaussian blur. Make sure to save these images as high quality jpegs.
2) Register the widefield image to the screen grab using "Registar" following step4 above. This image is then pasted over the screen grab in Photoshop. Select "lighten" mode and the image should remain transparent to the starfield. You can alter the opacity to adjust the transparency.

3) Next you will make your FOV template layer. Mag up the image with the FOV template to 500%. Using the color range tool select the orange FOV template. Inverse select and blur out the stars with a strong gaussian blur.
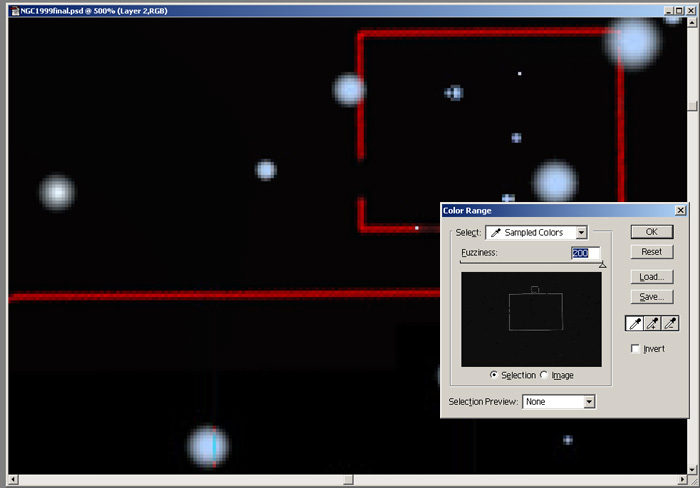
Select the orange FOV template (see above image).
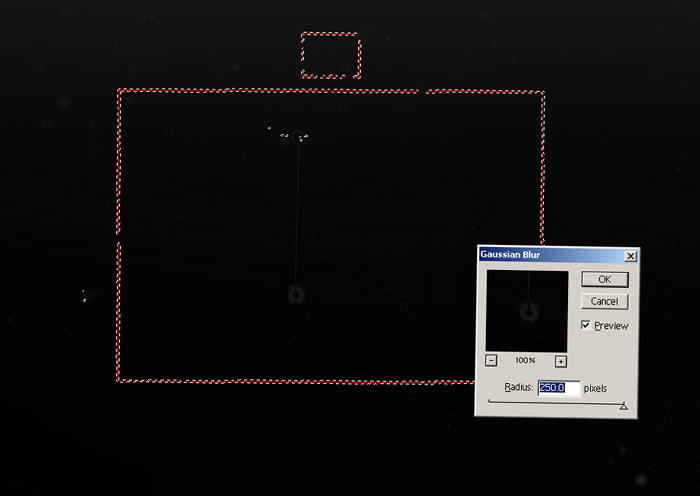
Inverse select, then apply a strong Gaussian blur to the background (see above image). Select, cut, and paste this image over the photoshop document made in step 2. Use "lighten mode".
4) As stated above select, cut, and paste your newly created FOV template over the photoshop image you created in step 2. Make sure not to alter the image sizes of the component layers during the above steps as keeping the scales of the various layers is extremely important as you will use these layers to plan your camera orientation. You should now have a photoshop image consisting of three transparent layers (see image below). Remember to use "lighten mode" to maintain transparency. Also its a good idea to remove the rest of the black background from the FOV template layer (layer 2) by any method you choose such as using the rectangular marquee and deleting large areas both inside and outside the orange template or by selecting the black background using the color range tool and deleting it. This will make it easier to rotate this layer later on.
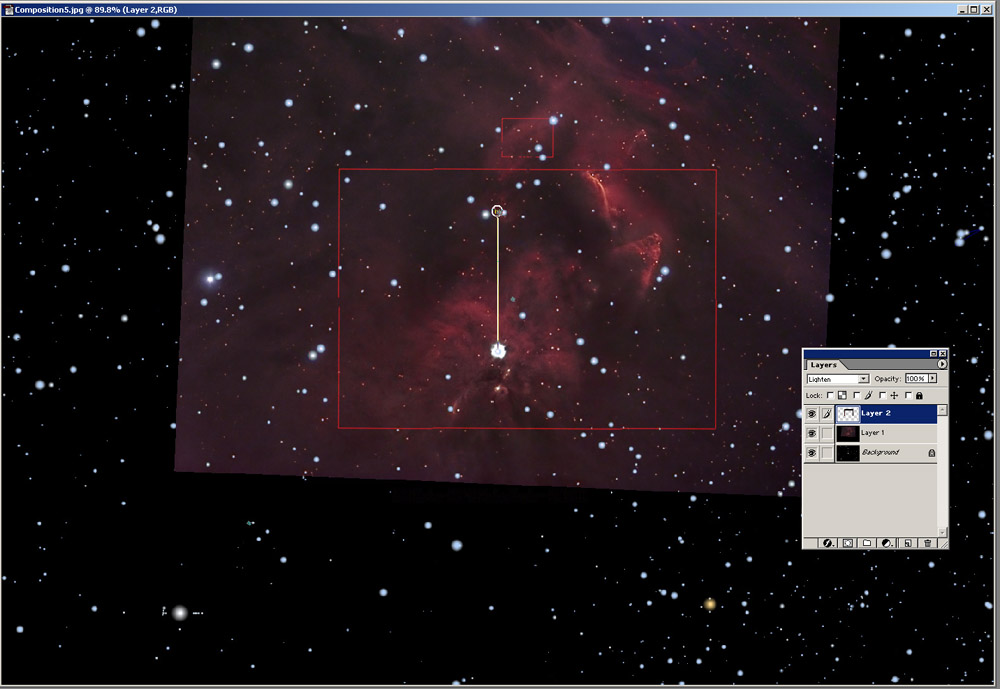
widefield image of NGC1999 courtesy of Steve Cannistra
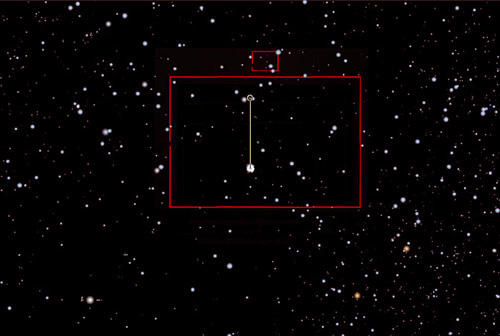
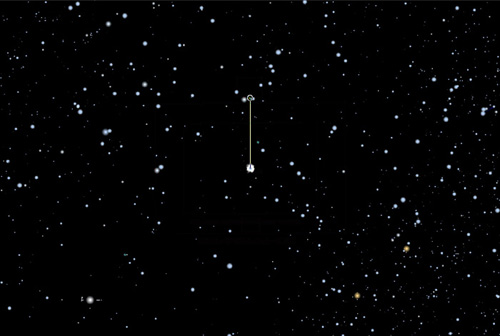
The three layers (all in "lighten" mode) you should have are
A) Background made from the screen grab taken from "The Sky"
B) Layer 1 is the widefield image of the object
C) Layer 2 is your FOV tamplate
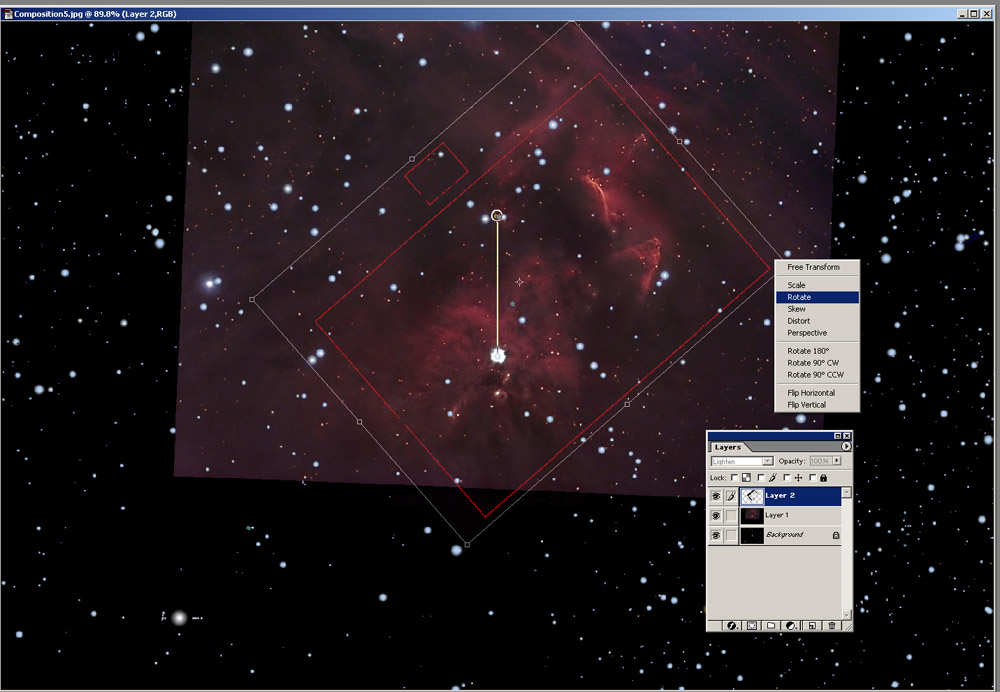
5) Next using the ability to rotate the layers (from right mouse menu select "free transform" then "right click" again and select "rotate") you can rotate the FOV template (by grabbing the edges of the layer) over the image and starfield until you find the desired composition and a suitable guidestar. See below how I used this method to plan my composition of the NGC1999. Rotating the FOV template allowed me to find a composition that included NGC 1999 and the waterfall nebulae and also a suitable guidestar. The amount of camera angle rotation is then easily calculated from the image.
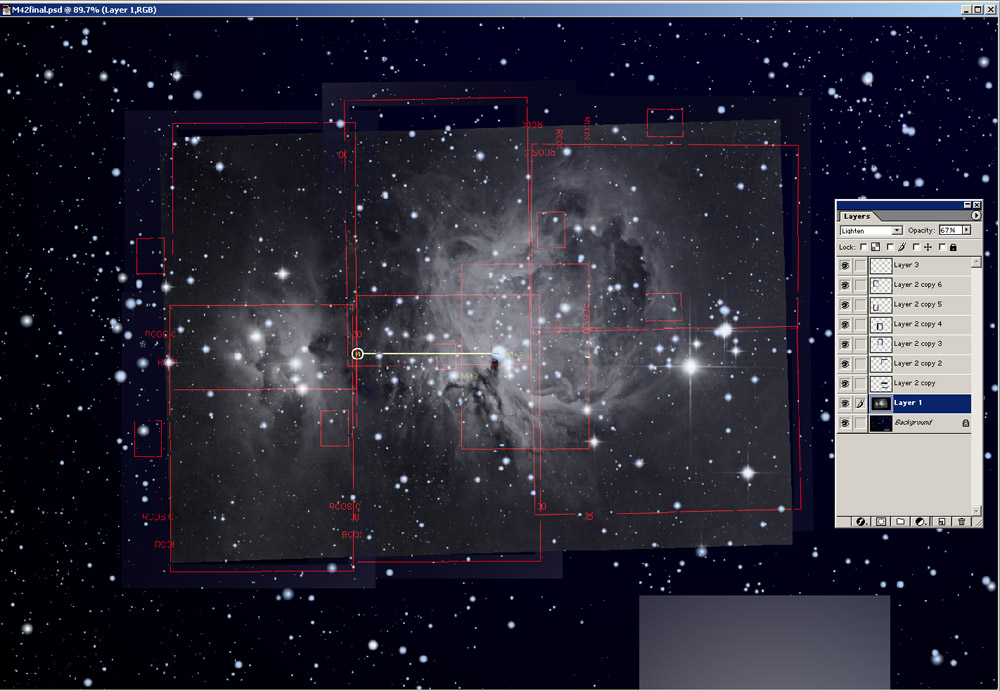
6) I've used this method to plan complex mosaics and composites in which I used different instruments and needed to use different FOV templates.
See the planning templates for M31 and M42 below. To view the completed mosaics click on M42 or M31