Color CCD imaging poses many unique challenges and frustrations to the astroimager. Despite these difficulties beautifully aesthetic color images are obtainable using a new innovative technique developed by astroimagers.
Although highly sensitive throughout the visual spectrum most
CCD detectors are exquisitely sensitive in the infrared (IR) and
nearinfrared. Although an advantage for monochrome imaging, this
strong IR signal must be rejected if we desire to make an accurate
color image. The IR signal will corrupt the color data and degrade
the purity of the color signal. In practice this is accomplished
by a separate or integrated IR rejection filter.
The result is an image acquired through color filters that has
a limited but pure spectral range. The filtered color data is
often weak, which makes the image grainy and low in contrast.
In astroimaging terms we say the image has a low signal/noise
ratio (S/N) and as a result is aesthetically unappealing. Although
one could boost the S/N by using a very large aperture telescope,
a highly sensitive CCD, or extremely long exposures, for many
these options are not practical or affordable.
A new technique called "Luminance Layering" has been
developed independently by Dr. Kunihiko Okano and Robert Dalby.
The technique allows astroimagers to overcome the "tricolor"
hurdle. When used with RGB filters it is referred to as "Luminance
Layering" or "LRGB" technique (the "L"
referring to "luminance"). The technique can be used
with other color filters such as CMY (cyan, magenta,yellow) filters
or with film images with comparable success. The basic premise
of luminance layering is that by combining an unfiltered high
resolution and high S/N greyscale image with the weaker color
data we can in essense "buy back" the signal and detail
lost in our filtered RGB exposures. The end result potentially
should be a more aesthetically pleasing high contrast color image.
The explanation might be better understood if we look at the HSL
(Hue, Saturation, Luminance) model of color perception. In the
HSL model each color is perceived as having hue, saturation and
brightness (luminance). The eye tends to disregard noise in hue
and saturation (color data) but is highly sensitive to noise in
the luminance component. Conversely, the detail in the image from
the eye's perspective is carried almost exclusively in the luminance
component of the visual data. What "luminance layering"
does in essense is to replace the poor quality, low S/N luminance
of the original color data with the new high quality, high S/N
luminance image. The end result is a surprising improvement in
the quality, detail, and aesthetic appeal of color images.
In practice this means the luminance is usually a very long unfiltered
exposure (or multiple stacked shorter exposures) taken in maximal
resolution (unbinned) mode. Most imagers will spend the major
portion of their imaging session acquiring the luminance since
this data will give the final image its sharpness and contrast
(resolution and S/N). Since the color data will only affect the
hue and saturation (and will have little effect on the sharpness
of the final composite) most imagers acquire the color data in
a lower resolution mode (binned). Binning enables quicker color
acquisition at a higher S/N with little downside since the lower
resolution data will not degrade the final composite. Having said
this I should add that spending more exposure time on the RGB
(color data) will result in richer and more saturated color data
and is therefore worthwhile.
Step by Step Assembly of an LRGB Image using Photoshop 5.5
Photoshop (PS) is my preference for compositing the LRGB although it can be done using other excellent programs such as Maxim DL, MIRA, AIP, StellaImage, and others. I prefer photoshop for several reasons. PS places the RGB and the "L" in separate layers so these components can be manipulated and enhanced independently even after the images have been composited. PS is rich in color enhancement features such as the ability to adjust color within the shadows, midtones and highlights separately. Also adjustments in contrast, levels, and even nonlinear stretching can be performed on each color channel separately. I have not seen this kind of graphics depth in any astronomical image processing software program.
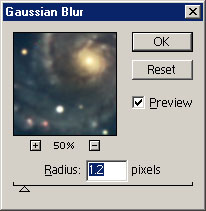
1) Prepare the color image; Once the images are acquired they must be calibrated (darkframe and flatfield) in the usual manner. This can be done with any of the excellent astronomical software packages of your choice. Once calibration is done, I usually begin by compositing my RGB first. Again there are several programs that are very capable of doing this. Since in most cases the RGB was taken at a lower resolution it must be resized (and resampled ) to match the higher resolution of the luminance. The RGB composite can then be further enhanced by nonlinear stretching, DDP, etc. Finally it must be saved as an 8 bit tif file (24 bit color). A mild gaussian blur (approx. 1 to 2 pixels) can be applied at this time (Fig 1) to smoothen the RGB image. Alternatively you can do this after compositing the LRGB in PS (but before flattening the image).
Note: The Luminance image will probably have much higher contrast than the RGB image. Because of this discrepency in contrast, unnatural or muted colors can occur in the final LRGB composite. To naturalize the color I apply a gammalog stretch to the RGB and dial up the contrast and saturation a bit before compositing with the luminance. The resulting RGB will have a grainy appearance but the noise will be offset by the gaussian blur (Fig.1).
2) Get the luminance into shape; This is an all important step since the "L" will provide almost all of the detail and contrast to the final LRGB composite. Any major enhancements such as DDP, nonlinear stretching, unsharp mask should be applied to the "L" image to bring out all its glorious detail. (In particular unsharp mask should only be applied to the luminance since it can have a negative effect on the color balance when applied to the color data). When you are satisfied then save the luminance as an 8 bit tif file.
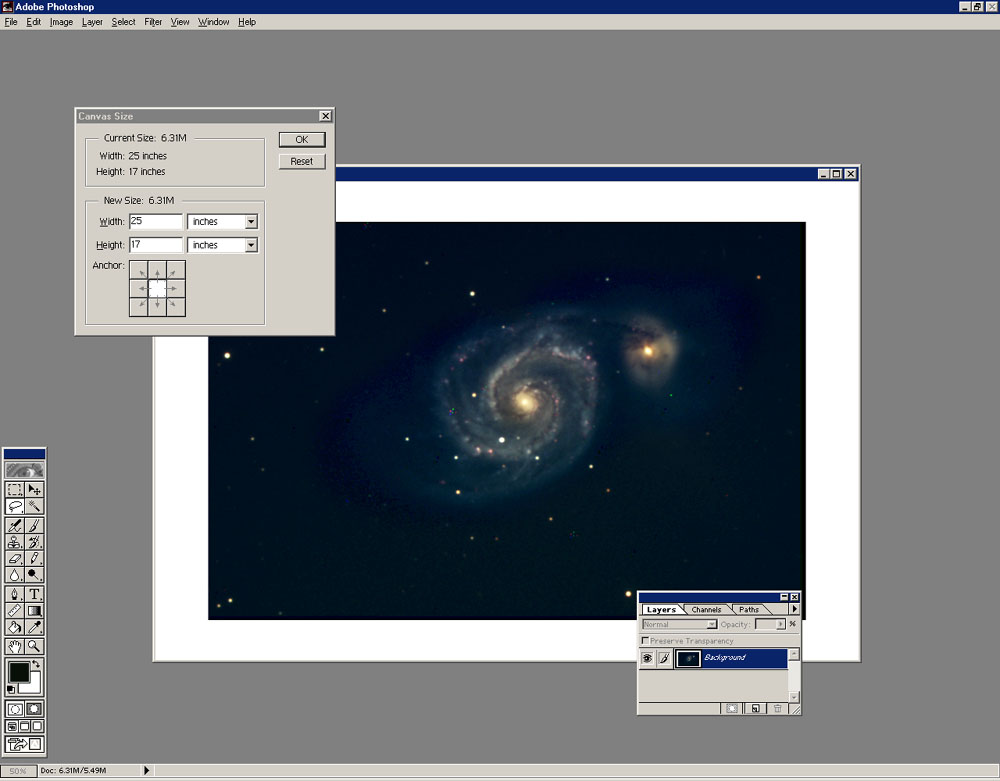
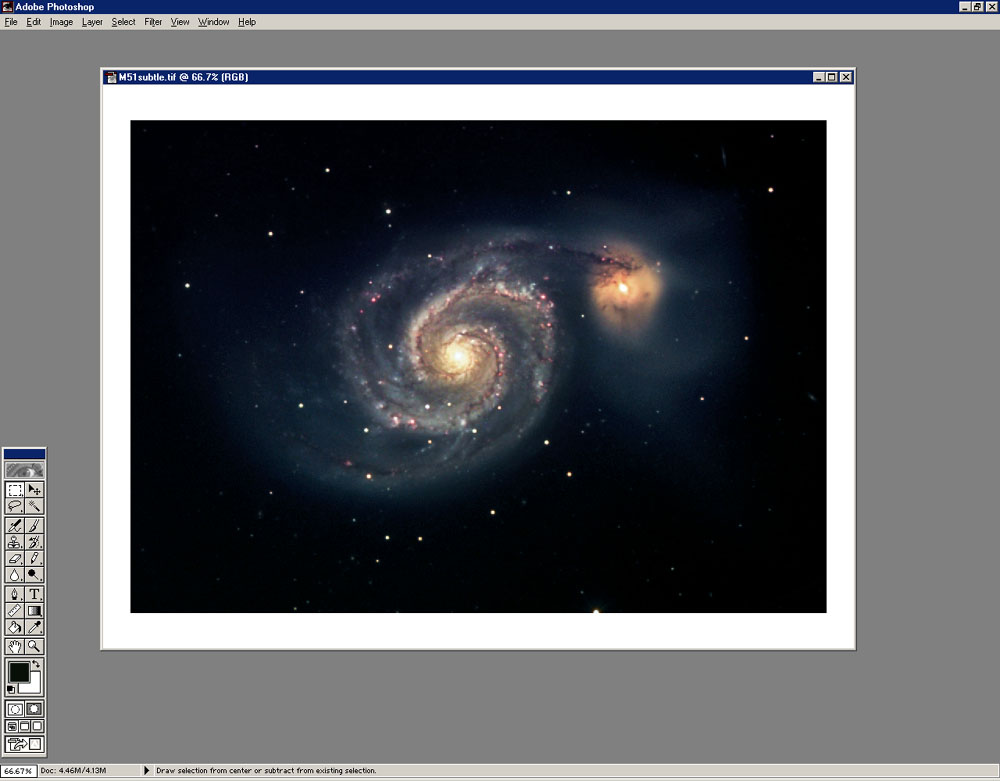
3) Opening the RGB on the Canvas; The next step begins the process of compositing the LRGB. First we open the RGB image. Keep the image smaller than your screen at this point. Next we create the canvas (Fig 2). The canvas is the platform upon which we will be composing the LRGB. In PS go to "image" then "canvas size". Click on the center square. It is wise to slightly increase your canvas height and width to give yourself some elbow room to work. Then click "OK" and the RGB image will be placed on the canvas. This will be your "background layer".
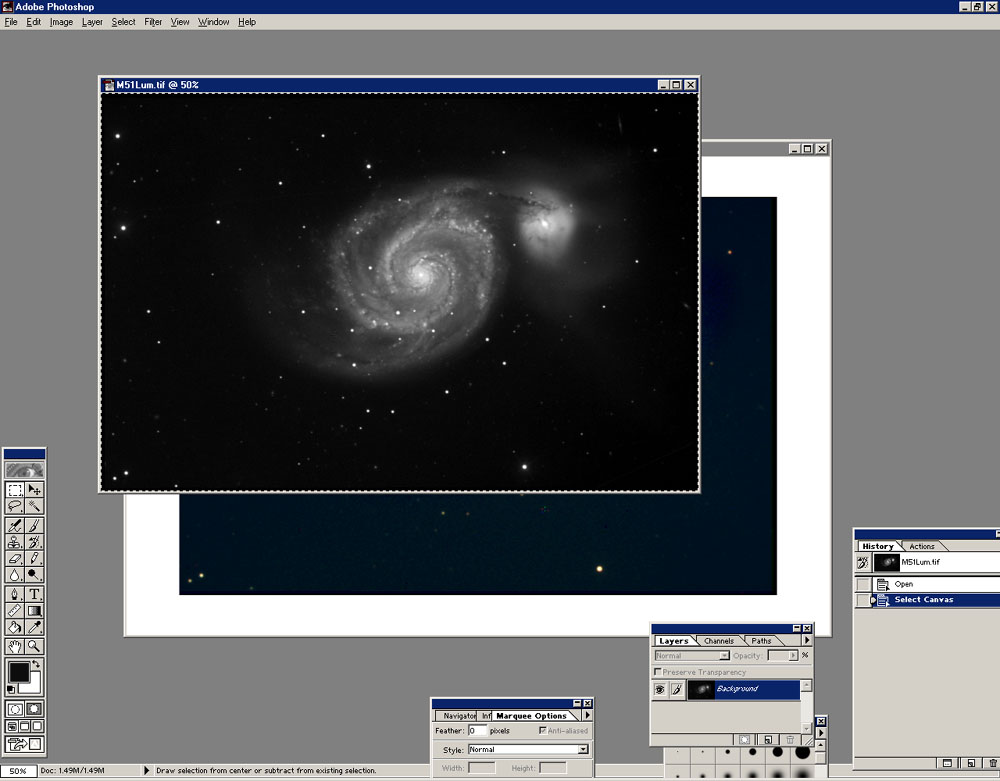
4) Pasting the Luminance on the Canvas; Next open your luminosity ("L") image . Go to "select" then "all". You will notice that the entire luminance image will be selected (Fig 3A).
Next go to "edit" then "cut". Close out the empty window that once held your luminosity. Go back to "edit" then click "paste". You will then see your luminance pasted on top of the RGB within the canvas (Fig. 3B).
Go the layers dialog box (if the menu box is
not visible then go to "windows" and click
alongside "show layers"). You will see that there are
now two layers; your RGB image which is now the "background"
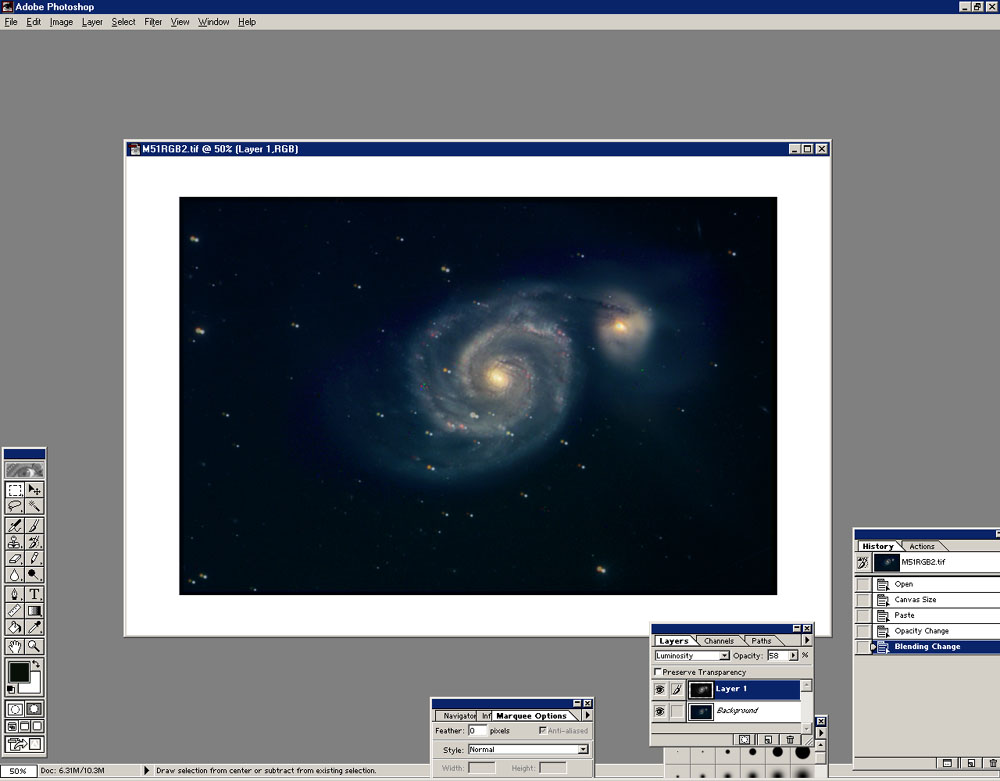
layer and the luminance which is now "layer 1". In the
layers dialog box select luminosity (at the bottom of the list)
(Fig 4A). Next, make the luminance transparent by changing the
opacity to approximately 50% (make sure the luminance layer is
highlighted).
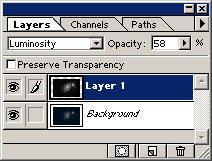 Fig. 4A
5) Making the LRGB Composite; Now you are ready to overlay (register) the luminance on the RGB. "Right click" on the luminance image and select "free transform". This will allow you to click and drag the now transparent luminance over the RGB until the stars match up. At this point zooming in to 100% or greater magnification will aid in precise pixel to pixel placement of the two images. Precise adjustments are made with the arrow keys. Sometimes you may find that the two images may be rotated relative to each other if perhaps polar alignment wasn't perfect or if the images were taken over a long period of time or on different nights. The best way to deal with rotation is to preregister the images in a separate program such as "Registar" so the images will line up perfectly in PS. Alternatively the transparent luminance can be rotated by right clicking, select "free transform", then right click again and select "rotate". The image can then be rotated by dragging the edges so the stars match up. Once the two layers are perfectly aligned hit the "enter" key. Bring the opacity back to 100%. Make sure at this point to save the composite as a photoshop document. This way you can go back to modify the two layers in the future. Merging the two images permanently is done by going to "layers" then "flatten image". Although I've said this step is permanent it can be undone immediately by "edit" then "undo flatten" or even after several other manipulations (up to 16 in PS 5.5) by going to "history" and deleting "flatten image".The beauty of PS is that before flattening the image you can select either layer and continue to adjust and enhance them separately. You may want to add more saturation to the RGB or apply a nonlinear stretch if the color appears muted. A gaussian blur or a particular filter can be applied to an individual color channel if desired. This can be handy if there is excessive noise or grain in a particular color channel. Additional sharpening filters or unsharp mask can be applied to the luminosity. When you are satisfied with the composite "flatten" the image and save it as an 8 bit tif file (24 bit color). Again make sure you've saved the photoshop document.
6) Final Touches; Now that you have a high S/N color image, final touches can be made (sharpening, color enhancement, brightness, contrast, etc.). I repair blooming spikes only after the LRGB composite and final adjustments to the color have been completed. Repairing spikes at an earlier stage may result in ugly artifacts and color distortion around the affected stars.
Using a Filtered Luminance
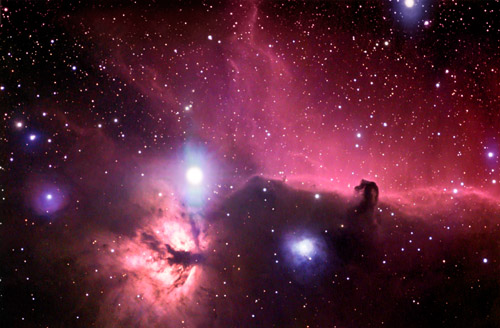
Up to now we have discussed the use of an unfiltered greyscale image as the luminance. This works well with galaxies and other objects having a broad spectral range. However if an object has a specific or narrow spectral emission then a filtered luminance can enhance the nebulosity in the image. Pure emission nebulas can greatly benefit from a "red filtered" or "hydrogen alpha" luminance. Even complex nebulas having detail in a dominant wavelength can benefit from a "filtered" luminance. Favorable effects of using a filtered luminance also include diminished stellar bloating, less blooming, and better preservation of star colors.
Examples of filtered luminance
 |
 |
|
|
|
|
 |
 |
|
|
|
|
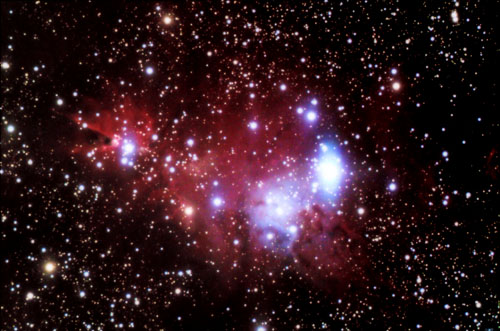
Notice the overall improvement in contrast and visibility of the fainter emission nebulosity and the greater detail in the images taken with the filtered luminance (RRGB). Also the RRGB images show smaller stars which retain their natural color better than the stars in the LRGB images. Note also that the overall color balance is not significantly affected.
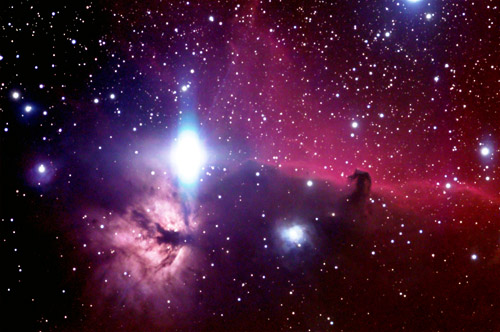
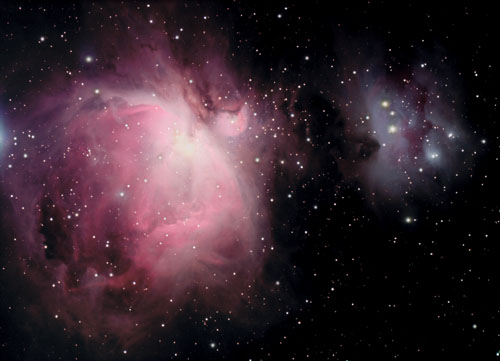
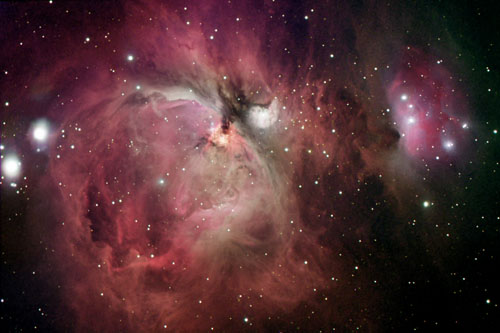
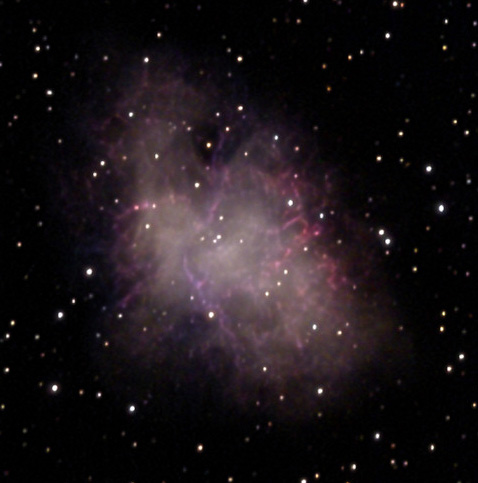
Filtered Luminance can also be applied to more complex nebulas (see below) to enhance the detail in specific regions of interest. Note there may be some shift of the color balance with a highly filtered luminance such as hydrogen alpha.
 |
 |
|
|
|
|
 |
 |
|
|
|
|
Conclusion
Luminance Layering technique can greatly enhance the amateurs ability to successfully produce high quality color CCD astroimages. I hope the above guidelines will help amateurs get started with this new innovative technique.